

Changing the oil in your motorcycle is an essential maintenance task that ensures optimal performance and longevity of your engine. Regular oil changes help to keep your engine lubricated, reducing wear and tear on components. This guide provides a clear, step-by-step approach to effectively changing your motorcycle’s oil, making it an achievable task for both novice and experienced riders.
In this guide, you will learn the importance of this routine maintenance and the correct procedures involved in performing an oil change. Understanding when and how to change your motorcycle’s oil will not only enhance the overall health of your bike but also provide a sense of satisfaction from being directly involved in its upkeep. Follow these steps carefully to ensure you complete the process safely and efficiently.
Preparing Your Motorcycle for an Oil Change
Before you start the oil change process, it’s essential to prepare your motorcycle to ensure a smooth and efficient experience. First, make sure you have the necessary tools and materials ready. You will need an oil filter, the correct type and amount of oil, a wrench or socket set, an oil catch pan, and possibly a funnel. Having everything organized will streamline the task.
Next, choose a well-ventilated area to work, preferably on a flat surface. This setup helps prevent spills and provides adequate space to maneuver around your motorcycle. It’s also advisable to let your motorcycle run for a few minutes before starting the oil change. Warming up the engine allows the oil to thin, facilitating better drainage.
Once your motorcycle is warmed up, turn it off and allow it to cool for a short period to avoid burns. After a brief cooling time, secure your motorcycle on a stable stand to keep it upright. This stability is crucial for safely accessing the oil drain plug and the oil filter.
Lastly, ensure the engine is off and the key is removed from the ignition to prevent any accidental starts during the service. Following these preparation steps will ensure that you can efficiently change the oil without any setbacks.
Selecting the Right Oil and Tools for Your Bike
Choosing the correct oil for your motorcycle is essential for optimal performance and engine longevity. Always refer to your bike’s owner manual to determine the recommended oil type and viscosity. Most motorcycles need either synthetic or conventional oil. Synthetic oils usually provide better protection and performance, especially in extreme conditions, while conventional oils might be sufficient for older models or casual riding.
The viscosity rating is another crucial factor. Look for the numbers and letters (e.g., 10W-40) on the oil packaging. The first number indicates the oil’s flow at cold temperatures, while the second number shows its performance at high temperatures. Using the right viscosity ensures that your motorcycle runs smoothly in varying conditions.
In addition to oil, you will need specific tools for the oil change. A wrench set is necessary for removing the oil drain plug. Make sure you have the correct size socket to avoid stripping the bolt. An oil filter wrench is also important for loosening and tightening the oil filter securely. A funnel can help pour new oil into the engine without spilling. Lastly, keep a container ready for the old oil disposal, as it should be recycled according to local regulations.
Having the right oil and tools at hand simplifies the oil change process, making it easier and more efficient. Always invest in quality products to ensure the best care for your motorcycle.
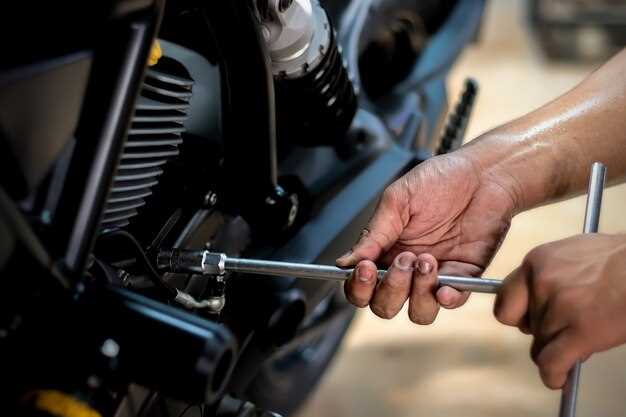
Executing the Oil Change Process
Begin by ensuring the motorcycle is on a stable surface and the engine is cool. Use a motorcycle stand if available. Locate the oil drain plug underneath the motorcycle and place an oil pan underneath it to catch the old oil.
Using the appropriate wrench, loosen and remove the drain plug. Allow the old oil to completely drain into the pan. While the oil is draining, locate the oil filter. Use an oil filter wrench to remove the old oil filter, taking care to keep the rubber gasket with it. Some oil may spill out, so have a rag or paper towels ready.
Before installing the new oil filter, apply a small amount of fresh oil to the rubber gasket of the new filter. This helps create a proper seal. Screw the new oil filter in place hand-tight to avoid over-tightening.
Once the old oil has fully drained, replace the drain plug securely, ensuring it is properly tightened but not over-tightened to prevent stripping the threads.
Now, prepare to add new oil. Refer to the motorcycle’s manual for the recommended type and amount of oil. Using a funnel, pour the new oil into the oil filler cap located on the top of the engine. Replace the cap securely after adding the oil.
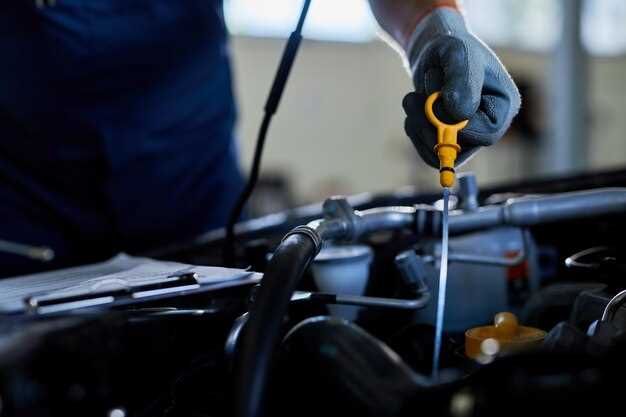
Start the motorcycle and let it run for a minute. This allows the new oil to circulate throughout the engine. Check for any leaks around the drain plug and oil filter. Once assured there are no leaks, turn off the engine and let it sit for a few minutes. Check the oil level using the dipstick or sight glass, adding more oil if necessary to reach the proper level.
Finally, dispose of the used oil and oil filter properly by taking them to a local recycling center or disposal facility. Your motorcycle is now ready for the road with fresh oil for optimal performance.